Home » Articles posted by Eric Kegler
Author Archives: Eric Kegler
Why Commercial Landscaping Services Are Essential to Your Business
Whether you own a large office complex or a single commercial property, landscaping services are essential to your business. Attractive exteriors can increase customer satisfaction and property value, while also reducing the risk of liability issues like trip and fall accidents.
Landscaping maintenance services include weekly or bi-weekly mowing, trimming, edging, fertilizing, weed control and more to keep your commercial landscape in pristine condition. Contact Greensboro Commercial Landscaping Services for professional help.
A well-maintained commercial landscape is one of the most effective ways to attract customers. It reflects that the company cares about the customer experience, and that carries over to the way they do business as a whole. Customers are more likely to trust a business that takes pride in its appearance and is willing to invest time, money and energy into its landscape.
The landscape of a business can help to convey its brand and culture, which is especially important in the competitive retail environment. The design of the exterior and the selection of plants can reflect a variety of things, such as a family-friendly restaurant featuring herbs or a contemporary concert venue with bright pops of color. A landscaping professional can help a business owner decide what is appropriate for their unique needs and goals.
Attract New Landscaping Customers by Offering Promotions and Discounts
Offering incentives like discounts for first-time customers or package deals can be an excellent way to attract new customers. This is especially effective when combined with other marketing strategies, such as leveraging social media and optimizing your website to improve visibility.
Encourage Customers to Leave Reviews and Testimonials
Getting feedback from satisfied customers is an essential part of the customer acquisition process. Encourage your customers to share their experiences with your services by asking them to leave a review on your website or social media pages. Not only will this improve your reputation, but it will also help potential customers see what makes your business different from the competition.
Strategically Expand Service Offerings
Adding new service offerings to your landscaping business can increase your revenue and help you attract more customers. Identify the needs and preferences of your target audience and consider adding new services, such as outdoor lighting installation or hardscaping. This will enable you to position your business as a one-stop-shop for all of their landscaping needs and attract customers who value convenience and comprehensive service providers.
Participate in Local Community Events
Increase Employee Satisfaction
A commercial landscape that is properly cared for conveys the message that a business is organized, detail-oriented, and focused on quality. This helps establish credibility and trust with clients, customers, and employees alike. Additionally, studies have shown that employees working in green spaces are more satisfied, engaged, and productive at work.
Professional landscaping not only increases property value but also increases tenant satisfaction and retention. Attractive premises attract high-value tenants who are willing to pay premium rent for a space that is well maintained and reflects a commitment to quality.
In addition, well-designed and maintained landscapes are sustainable practices that promote environmental awareness, energy efficiency, and cost savings. Water conservation, eco-friendly materials, smart technology integration, and multi-functional hardscapes are some of the latest trends in commercial landscaping.
Landscaping maintenance services like irrigation system management, pruning, and mowing help to prevent soil erosion that can damage foundations and lead to costly repairs. Moreover, drainage systems direct stormwater away from buildings, which protects them from flooding and provides better water quality. Likewise, regular watering and seasonal color plantings promote a healthy and vibrant appearance.
Incorporating elements of functional landscaping, such as outdoor meeting areas and social spaces, helps to improve workplace dynamics by providing a variety of settings for meetings and events. Similarly, outdoor wellness spaces are designed to encourage employees to get fresh air, clear their minds, and recharge during breaks.
Whether your commercial property is a shopping center, office complex, or cemetery, we offer expert landscaping services to suit your needs. Our team of experts will work with you to ensure that the design and maintenance of your grounds is consistent with the spirit of the place and reflects the culture of your organization. We take into consideration the unique needs of each site, including the use of environmentally friendly materials and methods. We can also create a design that combines natural elements with architectural features to create an aesthetic and welcoming experience for your visitors. For instance, our cemetery landscaping services are sensitive to the memory of those buried and seek to create a tranquil atmosphere for visiting families.
Increase Property Value
A commercial property’s outdoor space is a crucial element that radiates the image and perception of the business. It’s also a major factor that influences employee happiness, which can increase productivity and customer service. With today’s increasingly competitive landscape, it’s essential to maintain a great first impression with the outside of your building.
Commercial Landscaping Services offer more than just aesthetic value; they also provide a number of other benefits, such as improved energy efficiency and increased property value. Landscaping projects such as planting trees, installing lighting, and creating a patio can make your property more attractive and functional. They also reduce energy costs by shading the building during warm weather and blocking harsh winter winds.
These improvements can add up and lead to a high ROI in the long run. Whether you’re planning on selling your property in the future or keeping it for generations, landscape design can increase its value. With the guidance and expertise of a professional landscaper, your commercial property can have a lush and attractive outdoor area that will add value to your property and help you stand out in the market.
In addition to the obvious curb appeal that landscaping offers, it can also enhance your company’s image and increase employee satisfaction. Studies show that when employees are happy at work, they’re more productive and provide better customer service. A beautiful outdoor space can help create a relaxing environment that inspires your employees and boosts morale.
A well-maintained commercial property reflects the quality of your business and shows that you care about the community. In a world where competition is fierce, it’s important to stand out in the market and attract customers with your image. Commercial landscaping can be an effective way to communicate your brand and establish a positive reputation in the marketplace.
Reduce Risk
Commercial landscape services can improve the safety and security of your property, making it a more welcoming environment for clients, employees, and visitors. A well-maintained landscape isn’t a one-time effort, however; it requires year-round attention and expertise to maximize your investment and protect your business.
Professional landscape services can minimize the risk of costly trip and fall lawsuits, as well as other hazards like dead tree limbs, uneven surfaces, and unattended litter. Proper landscape maintenance also reduces the amount of fertilizers and pesticides used, since native plants are adapted to local weather conditions and soil.
In addition to safe walkways, well-designed pathways can serve as a deterrent against unwanted access, preventing vandalism and trespassing. Expertly placed boulders and decorative walls can further discourage unauthorized entry by creating barriers that provide physical security while blending seamlessly with the natural elements of your landscape design.
Regular lawn mowing, trimming, and watering help to keep grass, shrubs, and trees healthy and thriving. Regular mulching helps to conserve moisture, suppress weeds, and promote soil health. Irrigation systems can be designed and installed to ensure that plants receive consistent, proper amounts of water. Regular pest and disease management helps to reduce the need for chemical applications, while invasive plant species can be monitored and controlled to prevent spreading.
Commercial Landscaping Services should also include seasonal preparations to protect the property from harsh weather conditions. For example, removing leaves and debris from the driveways, parking lots, and sidewalks before winter storms can prevent dangerous ice build-up. In addition, snow plowing and removal helps to ensure that vehicles and pedestrians can safely access the property during winter months.
Choosing the lowest bid and a landscaping company that doesn’t understand your specific needs can be more expensive in the long run. Commercial landscaping service providers that have experience working on multi-site properties and local climate conditions are more likely to offer cost-effective, time-saving solutions that will help you avoid expensive water bills and unnecessary pesticide and fertilizer application. Xeriscaping, water-efficient irrigation systems, and drought-resistant plant selections are often the best options for areas prone to extreme weather.
Enhancing Home Protection with Modern Siding Installation
Siding installation enhances the appearance and durability of a home. Proper siding protects the structure from weather damage and pests. It also improves energy efficiency by providing insulation. Professional installation ensures long-lasting results.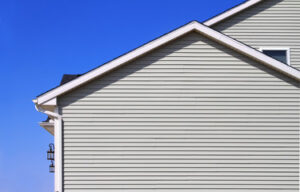
Selecting the right siding material is essential for performance. Modern options include vinyl, fiber cement, wood, and metal. Each material offers distinct benefits in terms of durability and maintenance. The right choice depends on climate and design preferences. Visit https://sidinginstallationlongisland.com/ to learn more.
Preparation is crucial before siding installation begins. The surface must be clean and free of debris. Damaged areas need to be repaired to create a stable foundation. Proper preparation ensures that the siding adheres securely.
Insulation adds another layer of protection during installation. It helps regulate indoor temperatures and reduce energy costs. Professional installers use moisture barriers to prevent water damage. Proper insulation enhances overall home comfort.
Measuring and cutting siding requires accuracy. Professional installers use precise tools to ensure clean edges. Proper alignment creates a seamless and polished appearance. Accurate cutting reduces the risk of gaps and misalignment.
Fasteners play a key role in securing siding panels. Nails and screws must be positioned correctly to allow for expansion and contraction. Over-tightening can cause warping and cracking. Proper fastening maintains the siding’s integrity over time.
Ventilation gaps are necessary to prevent moisture buildup. Siding should be installed with slight spacing to allow airflow. Trapped moisture can lead to mold and structural damage. Proper ventilation protects the home from internal damage.
Trim and corner pieces create a finished look. Professional installers ensure that joints and edges are aligned. Caulking and sealing prevent water infiltration. Attention to detail enhances both the appearance and function of the siding.
Color and texture choices impact the overall design. Modern siding materials come in a variety of finishes and shades. UV-resistant coatings prevent fading from sun exposure. Proper selection enhances curb appeal and long-term value.
Weather resistance is a critical factor in siding performance. High-quality materials withstand extreme temperatures and humidity. Wind resistance ratings ensure that the siding remains secure during storms. Professional installation maximizes weather protection.
Pest resistance enhances the longevity of siding. Termite-resistant materials protect the underlying structure. Proper sealing reduces entry points for insects. Long-term protection prevents costly repairs.
Fire resistance is an important safety feature for siding. Some materials are treated to prevent combustion. Professional installers follow fire safety codes during installation. Fire-resistant siding enhances overall home safety.
Maintenance requirements vary by siding material. Vinyl siding requires occasional washing to remove dirt and debris. Wood siding needs regular sealing and staining to prevent moisture damage. Professional advice helps homeowners maintain siding properly.
Durability depends on material quality and installation technique. Properly installed siding can last for decades without major issues. Impact-resistant materials prevent dents and cracks from hail and debris. Professional installation maximizes long-term performance.
Eco-friendly siding options are becoming more popular. Recycled and sustainable materials reduce environmental impact. Energy-efficient siding lowers heating and cooling costs. Green siding solutions reflect modern environmental values.
Soundproofing benefits are an added advantage of quality siding. Insulated siding reduces noise from outside traffic and neighbors. Proper installation creates a tight seal against sound transmission. Improved soundproofing enhances indoor comfort.
Moisture management protects the structural integrity of the home. Siding materials with water-repellent coatings prevent mold and mildew. Professional installation includes flashing and drip edges to direct water away. Proper moisture control prevents rot and damage.
Expansion and contraction rates vary by material. Professional installers account for temperature-related movement. Proper gap spacing prevents buckling and warping. Knowledge of material behavior ensures long-term stability.
Energy-efficient siding reduces heating and cooling expenses. Reflective coatings minimize heat absorption. Insulated panels provide additional thermal resistance. Improved energy efficiency enhances home comfort year-round.
Protecting siding from impact damage extends its lifespan. Professional installers recommend impact-resistant materials for high-traffic areas. Reinforced corners and edges reduce vulnerability to dents. Durable siding maintains its appearance over time.
Custom siding designs create a unique and personalized look. Homeowners can choose patterns, textures, and color combinations. Professional guidance ensures that the design complements the architecture. Custom options increase curb appeal and resale value.
Historic home restoration often includes siding replacement. Professional installers match modern siding with original designs. Careful installation preserves the architectural integrity. Restored homes retain their classic charm with modern protection.
Environmental factors influence siding performance. Coastal areas require corrosion-resistant materials. High-altitude locations need UV protection. Professional recommendations help homeowners select the right material for local conditions.
Cost considerations include material and labor expenses. Professional installers provide accurate estimates based on project size and complexity. Investing in quality materials reduces long-term repair costs. Proper installation ensures value for money.
Warranty coverage adds peace of mind for homeowners. High-quality siding comes with manufacturer warranties. Professional installation includes labor guarantees. Comprehensive coverage protects against material and installation defects.
Damage from natural disasters can affect siding integrity. Professional installers assess storm damage and recommend repairs. Reinforcement options improve resistance to future events. Proper restoration restores both function and appearance.
Heat and cold exposure affect siding performance over time. Professional installers account for thermal expansion during installation. UV-resistant coatings prevent fading and cracking. Proper handling improves weather resilience.
Matching siding with roofing and trim enhances the overall design. Coordinated color schemes create a cohesive appearance. Professional advice ensures that materials complement each other. Harmonized exterior elements increase property value.
Protecting siding during landscaping and construction reduces wear. Professional installers recommend buffer zones and protective barriers. Proper distance prevents damage from soil, moisture, and impact. Preventive measures extend siding lifespan.
Installation timelines depend on project complexity. Professional teams coordinate to minimize disruption. Efficient scheduling reduces downtime for homeowners. Fast and professional service ensures timely completion.
Damage from wildlife can compromise siding integrity. Professional installers recommend pest-resistant materials and sealing techniques. Blocking entry points prevents nesting and chewing. Proper protection preserves siding condition.
Professional installers handle complex architectural details. Gables, dormers, and bay windows require precision cutting and fitting. Custom solutions ensure a smooth and even appearance. Expert craftsmanship enhances the final result.
Post-installation inspection ensures that siding meets quality standards. Professional teams check for alignment, sealing, and fastening. Any adjustments are made immediately. Final inspection ensures that siding performs as expected.
Professional siding installation improves both the appearance and function of a home. Careful material selection and expert handling maximize durability and efficiency. Long-term protection enhances property value and comfort. Investing in quality siding ensures lasting results.
Benefits of a Concrete Driveway
A well-maintained Concrete Driveway Orange County enhances your property’s value. It also indicates to potential buyers that the home has been well cared for.
Regularly cleaning your concrete, caulking cracks, lifting sunken slabs, and sealing the surface can prolong its life.
Strategically scheduling your project for an off-peak time can also result in significant cost savings.
Concrete is an exceedingly durable material, and when properly installed by professional contractors, a poured concrete driveway can last for decades. It’s also extremely affordable, providing a cost-effective option for homeowners looking to upgrade their property without going over budget.
Whether you’re looking for something simple or want to jazz things up with decorative patterns and colours, a textured concrete driveway is the perfect solution. This common type of concrete is mixed with aggregate, such as pebbles, shells, and small stones, to give it a unique look and feel. The resulting surface is slip-resistant and offers an attractive alternative to plain paved surfaces. The cost of a textured concrete driveway falls between $100-$150 per square metre, with pricing largely dependent on the type of aggregate chosen along with standard installation fees.
As a result, concrete remains the most popular choice for homeowners who are looking for a cost-effective solution that will last. However, homeowners should take into consideration factors such as climate conditions and anticipated usage when deciding which material is right for their property. In addition, if you’re considering adding any additional reinforcements or opting for decorative finishes, this will increase the total project cost.
Regardless of the material you choose, proper maintenance is vital for ensuring that your driveway will continue to perform and look its best. Regular cleaning and sealing is recommended to protect the integrity of your pavement against weathering and freeze-thaw damage. For the most effective results, always use a quality polyurethane sealer, and make sure to apply it liberally, filling all cracks and crevices completely.
If your driveway is beginning to show signs of wear, repairs will generally suffice and prolong its lifespan, but a full replacement may be necessary if significant damage has already occurred. Addressing cracking and sinking immediately with repairs will help to mitigate the need for a full replacement, extending its lifespan and improving your curb appeal at the same time. Ultimately, while asphalt is the most economical choice initially, concrete provides an excellent value for homeowners who are willing to invest in a long-term pavement solution that will add both function and beauty to their property.
Aesthetics
A concrete driveway adds value to your home and accentuates the aesthetics of your property. Unlike asphalt, which develops unsightly cracks and potholes over time, a well-designed concrete driveway will retain its visual appeal for many years with proper maintenance. The aesthetics of your driveway also play a crucial role in creating a positive first impression for visitors, neighbors and potential buyers if you choose to sell your home in the future.
A variety of design options are available to enhance the aesthetics of your concrete driveway and elevate your curb appeal. These include decorative stamped patterns, engraved designs, colored concrete, permeable solutions, and borders and edgings. These innovative ideas transform your driveway into a stylish and inviting entrance that sets the tone for your home.
One of the most popular options is to incorporate natural stone accents into your concrete driveway. Natural stone is durable, versatile and adds a stunning contrast to the smooth gray concrete surface. Stone can be used as a border, pattern, or centre strip, and can be treated and sealed to ensure durability against wear and tear from vehicles and harsh weather conditions.
Another way to enhance the aesthetics of your concrete driveway is by tinting the concrete. It’s surprisingly easy for a professional to add a nuanced color to your concrete, allowing you to customize the look and coordinate it with your house paint or landscaping colors. Using high-quality concrete stain and sealer ensures that your unique concrete colour will last for years without fading or chipping.
For a classic and timeless look, consider a circular concrete driveway with a running bond or brick-look pattern. This option combines the best of traditional and modern styles to create a sophisticated, elegant driveway that elevates your property’s overall curb appeal.
Alternatively, you can use seamless stamps to imitate the appearance of cobblestone or other natural materials in your concrete driveway. These innovative concrete overlays provide a subtle texture and a uniform look for your driveway, while retaining the durability of standard concrete. They’re also a more cost-effective solution than using patterned stamps and can be customized to match your home’s architectural style.
Low Maintenance
Concrete is a durable material that holds up well to heavy vehicles and is highly resistant to temperature changes. This durability minimizes the need for frequent repairs and resurfacing, which can reduce long-term costs. A concrete driveway can last 30 years or more when properly maintained, allowing homeowners to get the most return on their investment.
In addition to being a cost-effective and durable option, concrete also offers flexibility in terms of style and design. Concrete can be poured and stamped to create unique visual designs that enhance the curb appeal of a home. This versatility allows homeowners to select a concrete design that complements their aesthetic preferences and the architectural style of their house.
Compared to other paving materials, concrete is less prone to cracking. However, like all materials, concrete is susceptible to damage due to improper installation or weather conditions. Working with an experienced contractor who follows best practices for concrete placement, curing, and finishing can prevent cracking and other problems that may arise.
In general, concrete is a low maintenance material that requires very little upkeep to keep it looking great. Regular sweeping and occasional pressure washing can remove dirt, debris, and other contaminants that can cause surface damage. For more stubborn stains, apply a specialized concrete cleaner and scrub the area with a stiff-bristled brush. Rinse the area thoroughly to remove all traces of cleaning solution and restore the shine of the concrete.
Like all surfaces, concrete can become stained from oil and other liquids. If left untreated, these stains can cause a dull appearance and require more aggressive cleaning methods to remove. To protect the surface and extend the life of a concrete driveway, apply a stain-repelling sealer on an annual basis.
Like all paved surfaces, it is important to properly maintain a concrete driveway. Keeping it clean and free of debris will minimize the risk of deterioration and prolong its lifespan. Proper maintenance also includes repairing any cracks promptly to avoid further expansion and contraction, which can lead to structural damage. Homeowners should also consider using plastic shovels instead of metal ones to remove snow, as metal can chip the concrete surface and contribute to moisture penetration and discoloration.
Affordability
Concrete driveways are an affordable option compared to other materials such as interlocking pavers. They also offer long-term savings compared to asphalt driveways, as they require minimal maintenance and repair costs over their lifespan. The durability and aesthetic value of a concrete driveway can help increase the marketability of your home, increasing its potential for resale.
The cost of a concrete driveway is dependent on a variety of factors including size, slab thickness, finishing options, and labor rates in your area. Basic poured concrete is usually the most economical choice, while adding reinforcements such as rebar or wire mesh can significantly raise the price. Decorative options like staining, stamping, and heated concrete also add to the overall cost.
To keep your budget in check, choose a contractor with extensive experience in your region and specific project type. Ask for references from previous projects and read online reviews to ensure that you’re getting a fair price and quality workmanship.
A good concrete contractor will be happy to provide you with a quote for your project, but be sure to request multiple estimates from different companies to ensure that you’re making an informed decision. You should also ask your local authorities for information about permits and other requirements for your specific project.
The initial cost of a concrete driveway can be higher than an asphalt option, but it’s important to consider your budget and long-term investment goals when choosing the right material. By weighing these factors, you can make an educated decision that best meets your needs and will enhance the functionality and curb appeal of your home.
A new concrete driveway is an attractive and valuable addition to any property, offering a variety of benefits that can increase your home’s value and attract potential buyers. In addition to being durable and visually appealing, a concrete driveway can be designed with permeable features that allow rainwater to seep through, reducing runoff and improving stormwater management. Proper care and maintenance will also extend the life of your concrete driveway, further contributing to its value.
When It’s Time for AC Repair or Replacement
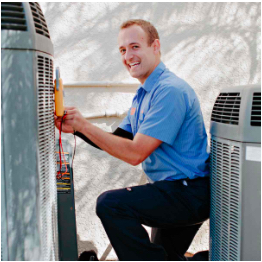 When your air conditioner isn’t working properly, it may be time to call for Air Conditioning Repair Van Nuys. Keeping your AC unit well-maintained can extend its life expectancy and improve performance.
Before calling for an AC repair, check to ensure the unit is powered up and has power at the thermostat and disconnect switch. Also, inspect the electrical conduits for rodent activity and reseal any open areas.
The evaporator coil is responsible for cooling the air in your home, but it needs a clean surface to work effectively. Over time, the coil can become covered with dirt and debris, which reduces its ability to absorb heat. If this is not removed regularly, you can expect to see problems with your system.
The coil can collect a lot of debris, including grass clippings, sand, pet hair, tobacco smoke, and rust. In addition, it can become infested with mildew and mold. These can create foul odors that are circulated throughout the house. They can also cause the air conditioner to turn on and off repeatedly, which is very expensive for your utility bills.
Dirty evaporator coils can cause a number of other issues with your AC unit. As the coil becomes dirty, it loses its ability to absorb heat, which cuts down on overall energy efficiency. This can lead to a rise in your utility bills and cause the system to run longer to reach the desired temperature. When the evaporator coil is too dirty, it can also prevent the thermostat from properly sensing when the room has reached the desired temperature and signaling the system to stop.
Your evaporator coil can also become damaged when it’s exposed to extreme temperatures. If the coil is exposed to excessive temperatures, it may degrade or even melt. This can cause severe damage to the air conditioning unit and require an expensive repair or replacement.
If you’re concerned about your evaporator coil becoming too dirty, consider using an air conditioner maintenance service that will clean the coil each month. These services usually include a check of the air filter as well as the evaporator and condenser coils.
Getting the evaporator coil clean is easy enough, but it’s important to make sure that the power to your air conditioning unit is off before you attempt any work. It’s also helpful to have an air conditioner expert show you where the coil is located and how to access it safely. You can use a soft brush to remove light amounts of dirt, but it’s best to have a professional perform any deep cleaning.
Refrigerant Leak
A refrigerant leak is a big deal and one that should be dealt with quickly. Refrigerant is a chemical substance that helps your AC unit perform cooling functions, and when there’s a leak, it’ll need to work harder to cool the air. This can drive up your energy bills. The best way to find a refrigerant leak is with either a special sniffer or by performing a simple soap bubble test on your evaporator coil. A bubble will form if the refrigerant is present, and it’s easy to see where the leak is located from there.
Leaks can also cause serious damage to your system if not handled promptly. They will eventually deplete the compressor of its oil, leading to a major repair that’s usually very expensive. In addition to this, a refrigerant leak will create hazardous fumes. Inhaling these can lead to dizziness, loss of coordination and concentration, and skin rashes. The worst-case scenario is that you could suffer from seizures and even lose consciousness if the leak is severe enough.
Another sign of a refrigerant leak is if you notice puddles on the ground near your unit. These puddles are usually caused by condensation that melts on the evaporator coil and drops to the floor. Larger leaks will produce a hissing sound as they escape.
You’ll want to call a professional air conditioning repair company as soon as you suspect you have a refrigerant leak. Some companies may try to cut corners by simply charging your air conditioner for a refill of refrigerant, but this is a dangerous solution. Refrigerant is escalating in price, and if you have to keep recharging, it will likely lead to the depletion of the compressor’s oil and result in an even more costly repair or replacement.
Additionally, working on your own AC system can void the warranty and possibly lead to more damage and serious consequences than just a refrigerant leak. It’s always wise to leave these tasks to professionals who have been certified by the industry. This will ensure that any future issues are properly diagnosed and repaired.
Dirty Condenser Fan
You may have heard the expression “dirt is cheap.” However, when it comes to your air conditioning unit’s condenser coils and fan, it’s a different story. Dirty coils prevent your AC from rejecting heat from the house, which in turn reduces cooling capacity. The condenser is filled with refrigerant, which takes excess heat and sends it outdoors to lower the indoor temperature. A dirty condenser coil keeps heat from escaping, forcing your AC to run longer and increasing energy bills.
In addition, a dirty condenser coil can damage the fan motor by overworking it. It can also attract colonies of bacteria and fungi, which can then release harmful spores into your home’s indoor air supply.
To prevent a dirty coil, regularly clean the outdoor unit’s fan blades and the surrounding area. Keep bushes and other plants at least three feet away from the unit, and make sure there’s plenty of room for airflow around the coil. Also, schedule regular maintenance with an air conditioning service company to ensure that your coils are free of dirt and other debris.
Your air conditioner has two coils: an evaporator coil and a condenser coil. While you can try to clean the evaporator coil yourself, it’s best to leave cleaning the condenser coil to an experienced professional. The professional can inspect your unit and make sure the fan, condenser coil, and surrounding areas are free of obstructions that could affect its performance.
If you suspect that your air conditioner’s condenser coil is dirty, shut off the circuit breaker and furnace switch, then remove the cover and disconnect the wires leading to the capacitor. Take a photo of the capacitor to note its size, make, and model (or just jot down the serial number). Purchase a replacement capacitor with similar specs from an appliance store or a furnace dealer. During installation, use needle-nose pliers to gently pull one wire at a time from the old capacitor and snap it onto the corresponding tab on the new one.
The capacitor stores electricity and releases it during compressor and fan startup to give them an extra jolt of power and smooth out voltage fluctuations that can otherwise cause electrical damage. When you replace the capacitor, remember to ground it by connecting its negative terminal to the metal case on the air conditioner’s chassis.
Faulty Thermostat
A thermostat has one simple job: to open and close the flow of coolant between an engine and radiator. But if this vital component goes bad, the consequences can be serious. Fortunately, there are a few telltale signs that you need to get your thermostat replaced as soon as possible.
A thermostat that erratically switches from hot to cold is the most common sign of a problem. This means the unit is not responding to the temperature setting and will switch back and forth, often with extreme changes in temperature. It can also indicate a problem with the thermostat wiring.
Another indicator of a bad thermostat is when the display reads a different temperature than what it feels like in the room. While minor fluctuations are normal, a big difference could mean the thermostat is not correctly calibrated or the wiring is damaged. A professional technician should check the wiring for damage and calibration.
If your HVAC system is running constantly, it may be because the thermostat has stopped sending signals to turn it off. This can cause the system to run indefinitely and lead to a spike in energy costs. A professional technician will look at the thermostat as well as the system’s electrical panel to figure out what’s causing it to stay on.
When a vehicle’s thermostat is stuck in the closed position, it can prevent coolant from flowing through the radiator and even cause the engine to overheat. This is a clear indication that it’s time to replace the thermostat and top off the engine’s coolant reservoir.
The thermostat should be easy to find, usually located near the upper radiator hose. It should be fastened with two or three 10 mm or 12 mm bolts and be easily removed. Once the bolts are free, it’s a good idea to use a plastic scraper to clean off any rust or corrosion from the mounting surface. This will help ensure that the new thermostat is seated properly and doesn’t leak.